Content
The two-dimensional pixel array of recorded data will always contain a certain number of pixels that are problematic and should therefore be excluded from any analysis. These could be pixels within overloaded reflections, module gaps in modern PADs or damaged pixels for a variety of other reasons.
Usually, those pixels will be marked within the image array (i.e. the image data/file we are using for processing) by a negatve value: this signals to the the processing software to ignore this pixels in the analysis. However, previously healthy pixels can get damaged with time and usage - so this detector-specific "pixel mask" needs to be updated from time to time (see discussion also here).
Whenever a dataset contains damaged pixels that have not yet been added to the pixel mask (and are therefore not yet marked within the dataset to be processed), processing results can potentially become suboptimal. In some cases, processing itself can fail completely already at the indexing stage (see example below).
With the 20190923 (Sep 23, 2019) release of autoPROC we now have a simple tool to help checking for and identifying those problem pixels. If such pixels are detected they can be
Here we will describe the use of a new (since the 20190923 release) tool: aP_detect_damaged_pixels.
If we suspect some problematic pixels in a given dataset - or even if we just want to check for those - we can just run
aP_detect_damaged_pixels *01.cbfin a directory with a full dataset. We don't need to use all images for this analysis, but should ideally use around 5-10 images well distributed throughout the dataset. The above command will take image 1, 101, 201, 301 etc.One could also use a command like
aP_detect_damaged_pixels `ls *.cbf | sort -R | head -n 10`to pick 10 randomly selected images.
The analysis done by "aP_detect_damaged_pixels" contains of two stages: first the images are analysed for pixels that are consistently high throughout the images and suspicious. This analysis also takes the surrounding pixel values into account (among other things) - so should not be confused by a poor beam-stopm but could miss pixels within a larger cluster of damaged pixels.
In a second step, some example close-ups of each pixel is generated and shown to the user for visual analysis (hitting "q" will exit each display). At this point one can very easily accept or discard this pixel: all accepted pixels will be given again in a final summary, together with an example setting of the autoPROC_Img2Xds_DamagedPixels parameter.
For HDF5 datasets (e.g. from Eiger/Eiger2 detectors) where no mini-cbf images are available, the "hdf2mini-cbf" tool can be first used to convert a dataset into CBF files:
hdf2mini-cbf -m your_master.h5
Running (on a dataset from July 2019) the command
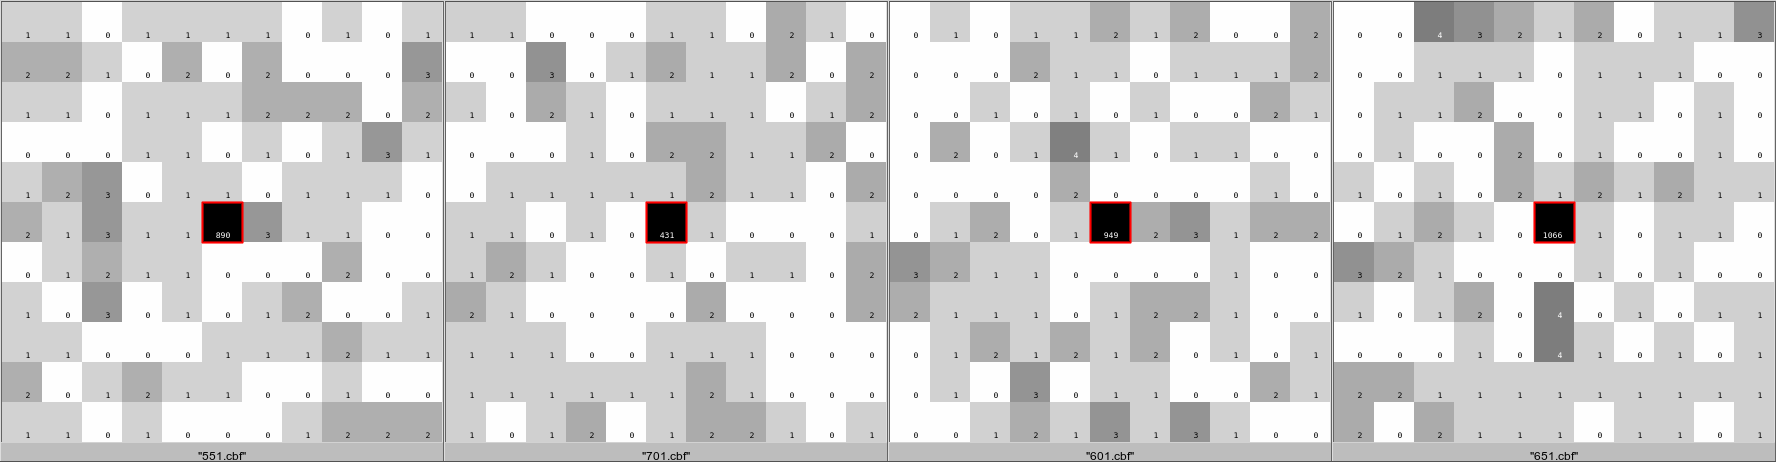
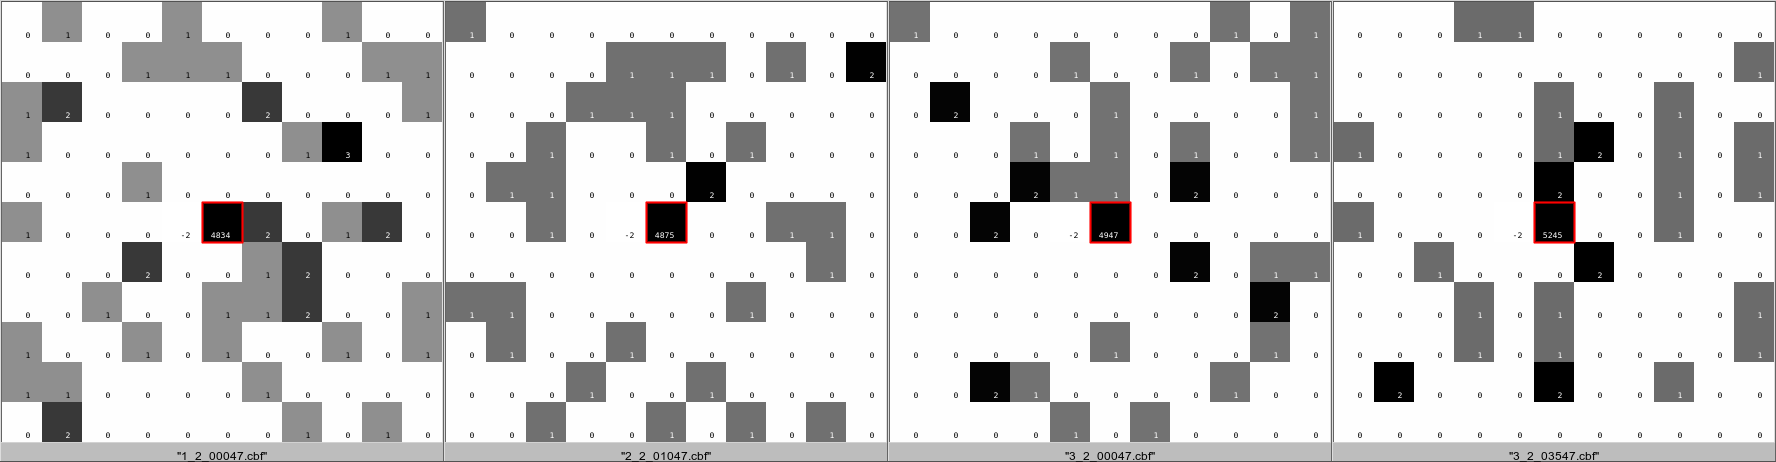
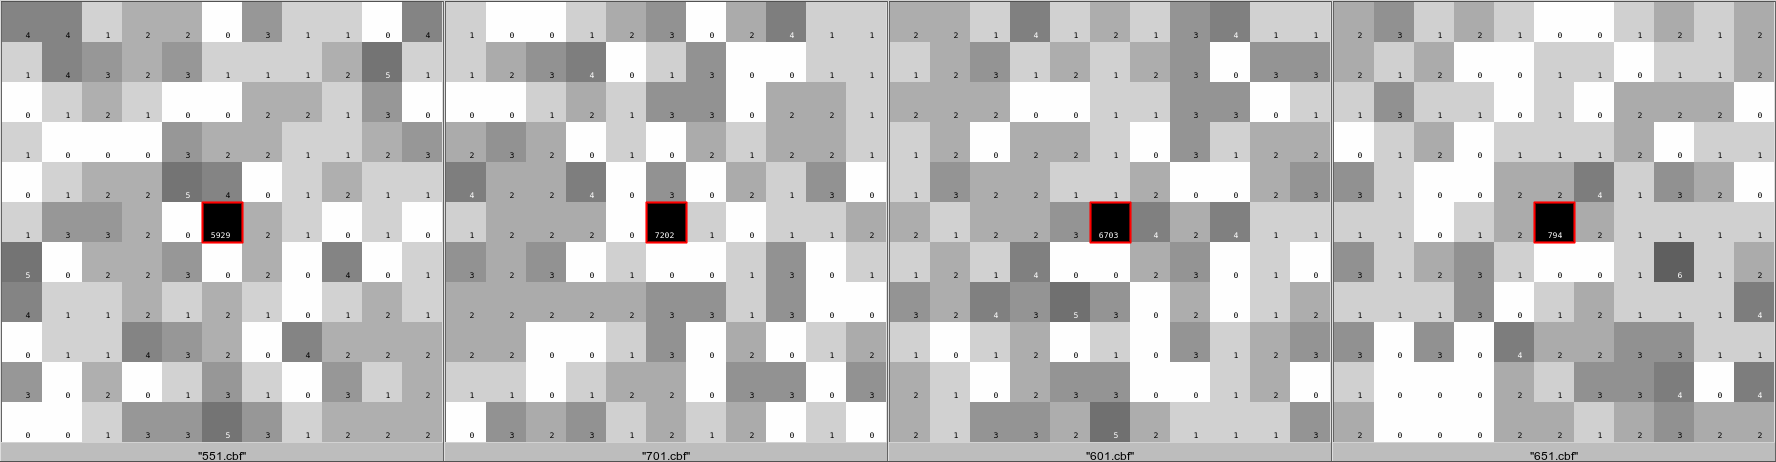
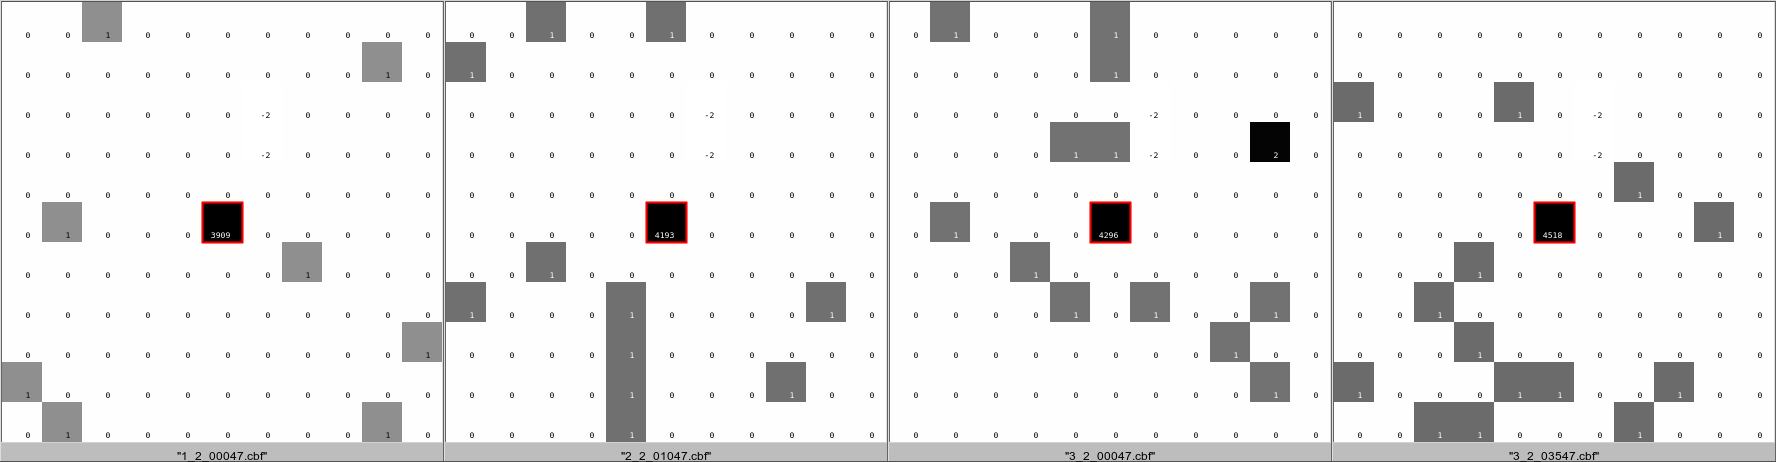
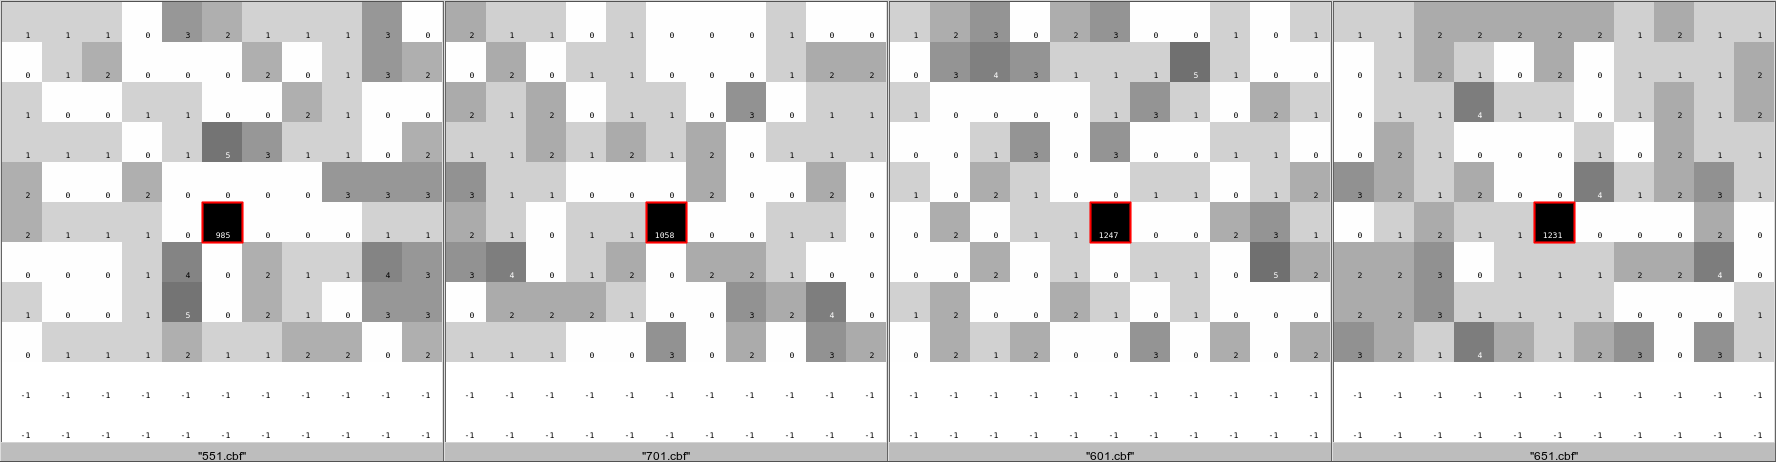
aP_detect_damaged_pixels Images/*01.cbfgives us a rather long list of potentially damaged pixels. Some example images shown (for checking/confirmation by the user) are (click to enlarge)
which clearly show that these pixels should be excluded from processing.
But does it matter? Of course, any integrated intensity from a reflection that includes such a damaged pixel will be incorrect and could cause problems later on - especially if it interferes with outlier detection, the analysis of anomalous signal or similar issues. One of the most obvious problems however occurs already much earlier: in the way spots are analysed to decide which one should go into indexing (and which ones should be rejected).
Within the default autoPROC/XDS path this happens at the COLSPOT stage. Processing the above dataset as-is (i.e. ignoring the fact that those damaged pixels should be excluded) will result in
 NUMBER OF STRONG PIXELS EXTRACTED FROM IMAGES     1040860
 NUMBER OF DIFFRACTION SPOTS LOCATED                 47937
 IGNORED BECAUSE OF SPOT CLOSE TO UNTRUSTED REGION    6519
 WEAK SPOTS OMITTED                                  35143
 NUMBER OF DIFFRACTION SPOTS ACCEPTED                 6275
while excluding those hot pixels gives
 NUMBER OF STRONG PIXELS EXTRACTED FROM IMAGES     1007075
 NUMBER OF DIFFRACTION SPOTS LOCATED                 47792
 IGNORED BECAUSE OF SPOT CLOSE TO UNTRUSTED REGION    6442
 WEAK SPOTS OMITTED                                    120
 NUMBER OF DIFFRACTION SPOTS ACCEPTED                41230
This is not too surprising, especially if these are not pixels with a constant, very high value (in which case they would count as a single "spot" along the rotation, but rather pixels with a certain amount of "jitter". These would then be counted multiple times as separate spots (because of the "peakiness" introduced) and will significantly bias the mean (and standard deviation) of all found spots towards much too large values. This then results in classifying much too many spots as too weak with desastrous results: instead of using about 40000 spots for indexing we are left with only about 6000, where a lot of the strongest ones will also be due to those damaged pixels - so completely wrong.
It is also interesting to look at the list of found spots via
% awk '{print int($1+0.5),int($2+0.5)}' SPOT.XDS | sort | uniq -c | sort -n
This will sort spot positions according to the number of times a particular pixel on the detector is a peak. If there are damaged pixels these might show up at the bottom of that list. An example could look like this:
 ...
      3 883 4582
      3 939 1010
     13 2036 4145
     23 1806 4193
     28 2036 4163
     76 273 3198
    161 1854 2584
It is likely that the pixels (1854,2584) and (273,3198) are somehow damaged - maybe not (yet) showing a very large value, but "flickering" with a lowish value that is still well above background. This would result in a large number of spurious spots/peaks at this position.
You should alo be suspicious of spots at the top of the SPOT.XDS file that have as Z coordinate (3rd number, corresponding to image number) exactly - or very close - the half-point of your data collection. An extremely strong peak at about image 1800 for a sweep with a total of 3600 images is likely to be due to a constant pixel of above-background value.
Although it is never possible to avoid damaged pixels in collected datasets at all times (since they can occur at any time), it is important to deal with them as efficiently and accurately as possible. For that end we are
Hopefully these tools will be useful to rescue existing datasets as well as helping beamline staff to provide an up-to-date pixel mask whenever possible, i.e. checking for damaged pixels after each maintenance or shutdown period.