Content:
5Z5U:
7XJ5:
Looking at ligands (and all that):
Introduction
We will run BUSTER from the command-line. So open a terminal on one of the processing machines and run
gphl
This will create a tutorial directly you can then work in. If you want to use the latest version of our software (to be released in the next couple of weeks), please type
gphllatest
You should now be able to see the online help via
refine -h
Note: It might be useful to make the terminal window larger, especially wide enough to avoid ugly line breaks that make it difficult to read the content of that help message.
There are some so-called macros available (collections of parameter settings for a particular task): for details see
refine -M list
As you can see, there are a lot of different flags to use, but the most common ones will be
Other tools you might want to look at (all will give help messages if run with -h flag):
- aB_hydrogenate: to place hydrogens onto model, either at nuclear or electron-cloud distance and either at zero or full occupancy
- we recommend using full occpancy at nuclear distance, i.e. running
aB_hydrogenate -full -p input.pdb -o output.pdb
- followed by using the -M HydrogenHybridModel macro for refine (to use nuclear position for geometry terms and e-cloud position for X-Ray)
- pdb2occ: to create a so-called Gelly file of additional occupancy-refinement commands; to be used with -Gelly command to refine
Remember that one BUSTER job (i.e. what happens when running the refine command) consists of multiple so-called "big" cycles - usually 5 - with (by default) up to 100 "small" cycles (iterations) each. Between each big cycle, the bulk solvent model is updated, X-ray weight automatically adjusted and (if requested) the solvent model (waters) is updated. Void correction happens before the final cycle.
If in ligand detection mode (with -L flag), the analysis of residual density for potential ligand binding sites also happens before the last big cycle.
Files
We need the following files for this tutorial:
The relevant files are already availabe in /data/rapidata2/SampleData2022/5z5u, so you should be able to copy them over using
cp -p /data/rapidata2/SampleData2022/5z5u/* .
But you can also fetch them directly via
 wget https://www.globalphasing.com/buster/wiki/plugin/attachments/WorkshopRapiData2022/5z5u.pdb
 wget https://www.globalphasing.com/buster/wiki/plugin/attachments/WorkshopRapiData2022/5z5u.mtz
 wget https://www.globalphasing.com/buster/wiki/plugin/attachments/WorkshopRapiData2022/5z5u_all.mtz
 wget https://www.globalphasing.com/buster/wiki/plugin/attachments/WorkshopRapiData2022/96U.cif
Alternative reflection data
For this 5Z5U example, you could also try and use the 5z5u_all.mtz file (data to 1.1 A resolution) instead of the default 1.6 A 5z5u.mtz. It is not quite clear why the structure was refined only against 1.63 A data, but intensities to 1.1A were deposited). This might be related to the severe anisotropy of the data:
Diffraction limits & principal axes of ellipsoid fitted to diffraction cut-off surface:

                              1.846         1.0000   0.0000   0.0000       a*
                              1.197         0.0000   1.0000   0.0000       b*
                              1.298         0.0000   0.0000   1.0000       c*
We could upload that high-resolution MTZ file (containing intensities) to the STARANISO server in order to create a new MTZ file after anisotropy analysis and correction:
Refinement steps
We can run a map-only computation using
refine -p 5z5u.pdb -m 5z5u.mtz -l 96U.cif -M MapOnly -d 5z5u.00 | tee 5z5u.00.lis
and look at the maps with
    cd 5z5u.00
    coot --pdb refine.pdb --auto refine.mtz
or with
    cd 5z5u.00
    visualise-geometry-coot
What can you see? Is there something interesting in the model and/or maps - especially for the ligand? Maybe some alternate conformations to be modelled? Or a wrong ligand (compare to PDB entry 5Z5T and the 96R compound, 96R.cif)?
A full refinement would look like this (see also your BUSTER reference card handout: and the manual):
refine -p 5z5u.pdb -m 5z5u.mtz -l 96U.cif -d 5z5u.01 | tee 5z5u.01.lis
and look at the maps with
    cd 5z5u.01
    coot --pdb refine.pdb --auto refine.mtz
or with
    cd 01
    visualise-geometry-coot
If you modelled some alternate conformations or partially occupied residues/atoms, you could then run
    cd ../

    pdb2occ -p 5z5u.01/refine-coot-0.pdb -o 5z5u.01/refine-coot-0.occ

    refine -p 5z5u.01/refine-coot-0.pdb -m 5z5u.mtz -l 96U.cif -Gelly 01/refine-coot-0.occ -d 5z5u.02 | tee 5z5u.02.lis
and then look again at the model and maps with
    cd 5z5u.02
    coot --pdb refine.pdb --auto refine.mtz
See also the examples in the manual for details.
Files for 7XJ5
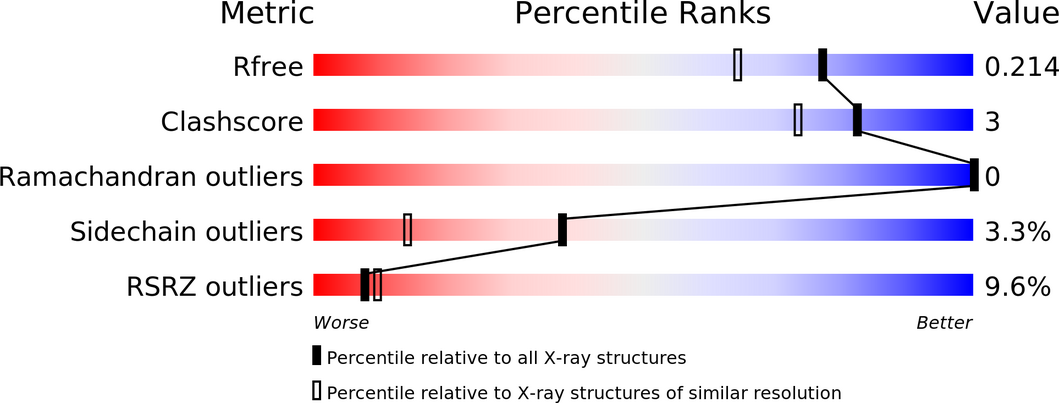
The 7XJ5 model seems to need a bit more refinement - at least when judging from the validation report. You can take the files
or get them afresh via
fetch_PDB 7XJ5
and the ECW restraint dictionary from the Grade webserver or from here: ECW.grade_PDB_ligand.cif. You might be able to run the refinement then yourself and look at the resulting maps - especially around the ligand.
Refinements
A simple map-only start would be to run
    refine -p 7xj5.pdb -m 7xj5.mtz -l ECW.restraints.cif -M MapOnly -d MapOnly | tee MapOnly.lis
    coot 7xj5.pdb MapOnly/refine.mtz
A full refinement could be done with
    refine -p 7xj5.pdb -m 7xj5.mtz -l ECW.restraints.cif -d 01 | tee 01.lis
    coot 01/refine 01/refine.mtz
Alternatively, you could try the automatic refinement protocol provided by aB_autorefine with
    aB_autorefine -p 7xj5.pdb -m 7xj5.mtz -l ECW.restraints.cif -d 02 | tee 02.lis
    coot 02/refine.pdb 02/refine.mtz
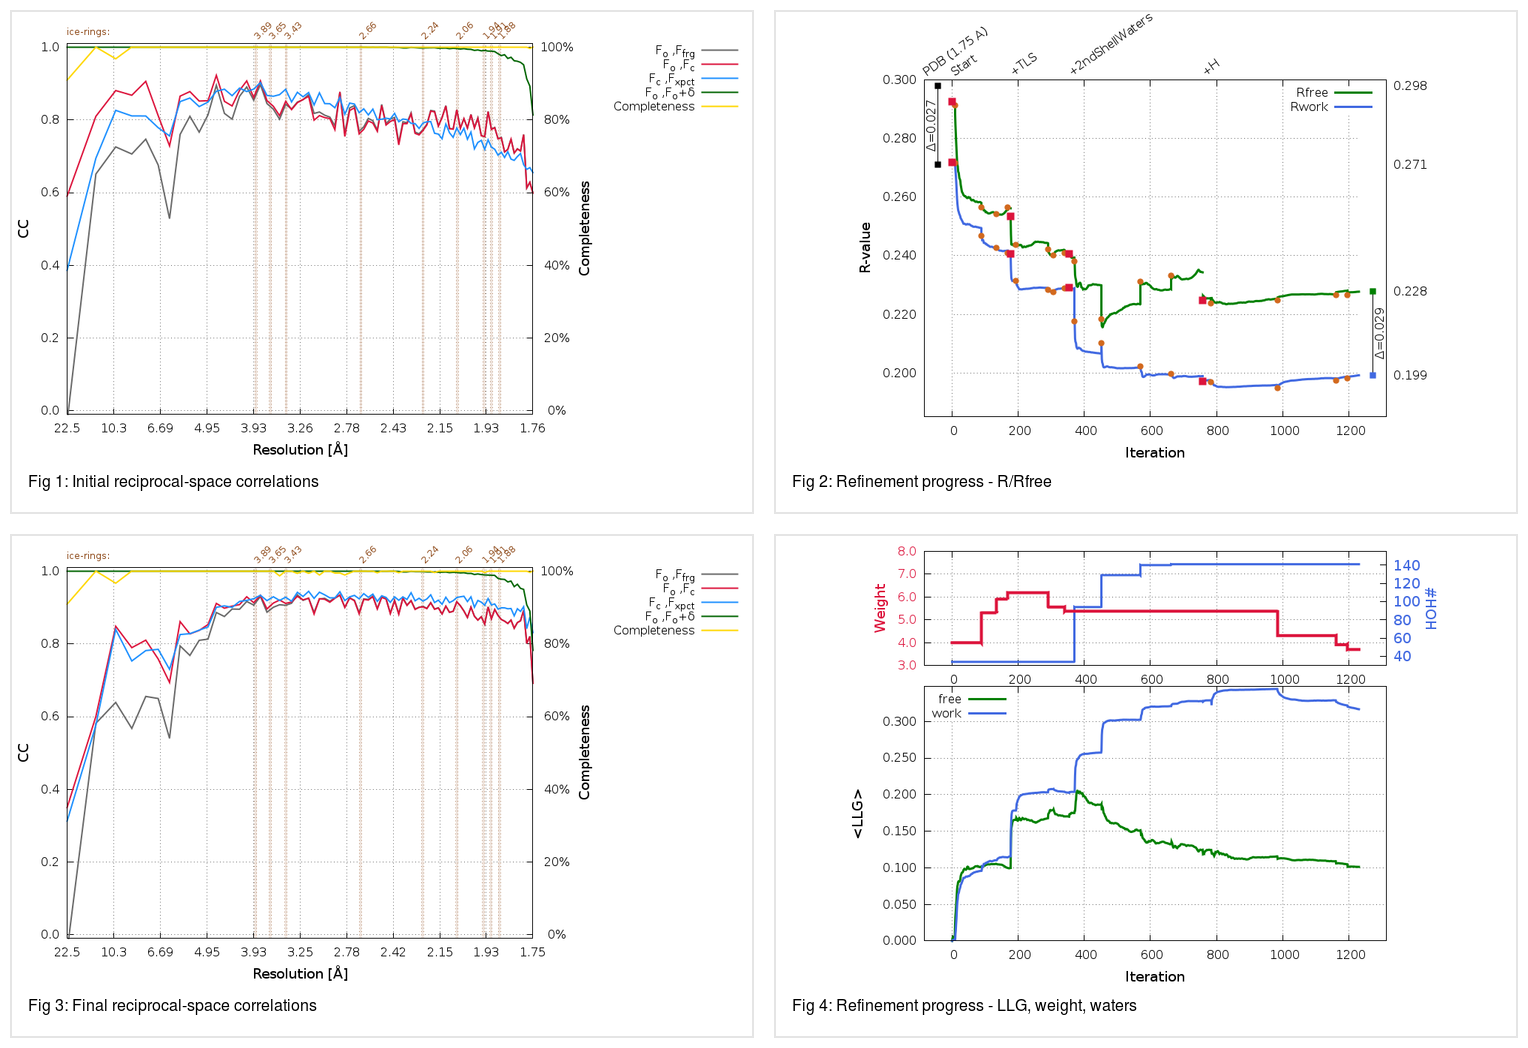
which will produce a final summary - showing e.g. the progress of R/Rfree at various steps
Please note how BUSTER starts with a very similar R/Rfree as the deposited model (refined with phenix originally), but manages to significantly reduce this from 0.272/0.293 to 0.199/0.228. This might be a very beneficial (and maybe outlier) example, but it shows that sometimes the fully automatic, all-default runs can already do a fairly good job at providing a maybe better starting point for manual model corrections and interpretations.
The model here might need some re-evaluation of the metal sites (and maybe additional sites) as well as the ligand itself.
Working with own data
What you need to have available:
- PDB file
- including relevant LINK and SSBOND cards
- please note that BUSTER ignores non-standard LINKR cards
- MTZ file
- merged and scaled with amplitudes
- (optional) anomalous differences
- (optional) F(early) and F(late) amplitudes, e.g. from autoPROC
- including test-set flags
- Ligand dictionary
- see Grade web service
- other CIF dictionaries also supported, e.g. $CLIBD_MON/f/FSE.cif
- to use all dictionaries that are distributed with CCP4: add the argument UseCcp4MonomerLibrary=yes to your refine command.
Note: If you don't have your own model/data yet and want to use an existing PDB deposition, use
fetch_PDB.sh PDBid
(with the correct PDB identifier of course) to get the model and reflection data as MTZ.
Some other tools that might be relevant for your particular problem (all support the -h flag to give you a help message):
- aB_covalent_ligand: to describe complex/complete chemistry (bond and angles) around covalent linkage of e.g. ligand to protein
- diff_fourier: to simplify computation and analysis of various difference Fourier map types
- BUSTER will compute anomalous Fourier maps automatically if the input MTZ file contains anomalous differences (usually columns DANO)
- if data comes from autoPROC (the output truncate-unique.mtz or staraniso_alldata-unique.mtz file), a F(early)-F(late) map for detecting/describing radiation damage will be computed and analysed too.
- add_freerflag.sh: to add an existing test-set flag to a new dataset (it will be extended if needed. If working within the same crystal form it is important to maintain the same test-set flags - otherwise the Rfree will be contaminated at the beginning.
After some initial refinement (and model building) you could also allow for automatic update of the water structure. So maybe start with something like
    refine -p my.pdb -m my.mtz -l ligand.cif -autoncs -d 01 | tee 01.lis

    cd 01
    coot --pdb refine.pdb --auto refine.mtz
(and do all necessary work in Coot, saving the coordinates at the end). The next step would then be
    cd ..
    refine -p 01/refine-coot-0.pdb -m my.mtz -l ligand.cif -autoncs -WAT -d 02 | tee 02.lis

    cd 02
    coot --pdb refine.pdb --auto refine.mtz
Switching on TLS refinement could be done via
    refine -p 02/refine.pdb -m my.mtz -l ligand.cif -autoncs -M TLSbasic -d 03 | tee 03.lis

    cd 03
    coot --pdb refine.pdb --auto refine.mtz
Using ADP refinement (for high resolution data):
    refine -p 03/refine.pdb -m my.mtz -l ligand.cif -autoncs -M ADP -d 04 | tee 04.lis

    cd 04
    coot --pdb refine.pdb --auto refine.mtz
Further automation
Since the 20220608 release we provide another level of automation with the aB_autorefine interface to BUSTER: it combines some high-level decision making about model parametrisation with a defined sequence of individual BUSTER jobs - and might be a good starting point for initial model refinement.


