Content:
Introduction
Here are some maybe more site-specific notes for the DLS-CCP4 Data Collection and Structure Solution Workshop held at Diamond in December 2019.
Getting data out of SynchWeb/ISPyB
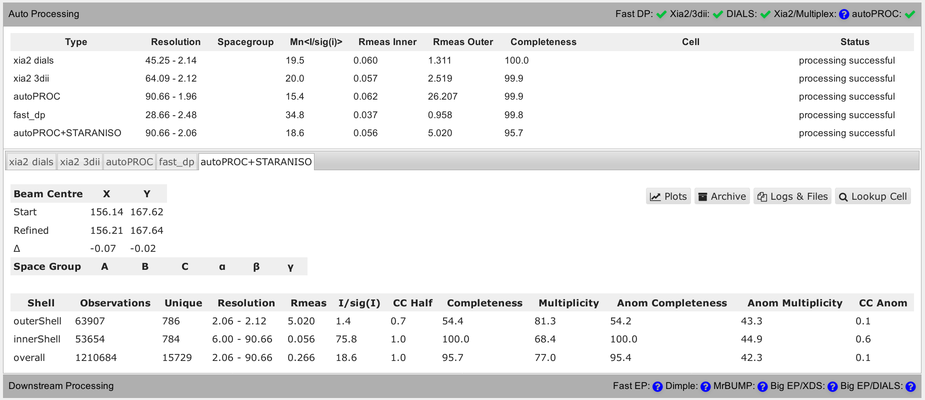
You should be able to get your data from the ISPyB/SynchWeb interface from different processing pipelines:
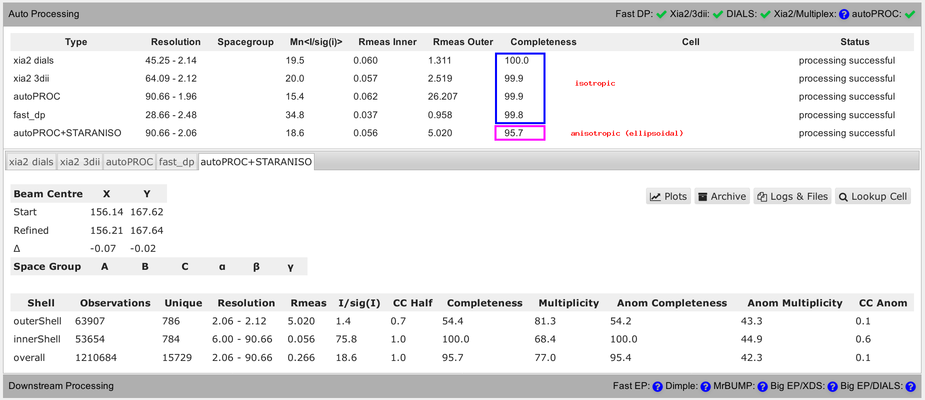
You should be aware of some differences in the numbers presented in that summary table. Firstly, the completeness value shown always assumes that the data diffracts isotropically. The autoPROC+STARANISO analysis ignores this and will determine an appropriate anisotropic cut-off without any assumption about a particular shape. For that reason, the isotropic completeness is an inadequate metric to describe the completeness of observations - and is nearly always lower than the better "ellipsoidal completeness".
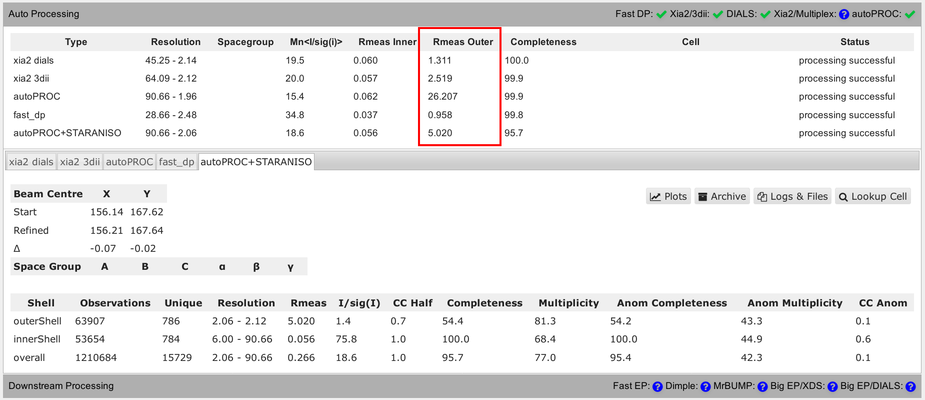
Another complication is the use of very different resolution binning methods between the different programs, which makes comparison of values in the outer shell rather difficult:
You can see that in the detailed view (for each pipeline), showing different bin widths and different number of unique reflections in the various bins. E.g.:
So as a summary: don't over-interpret these numbers unless they are describing the same quantity and have been computed in the same way.
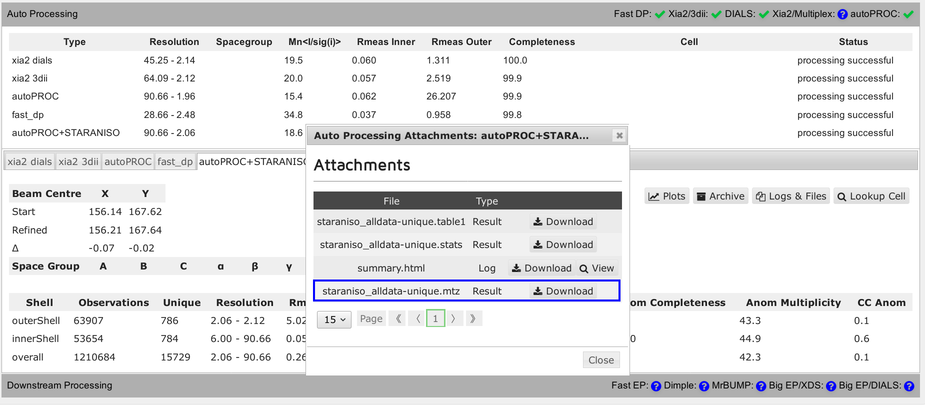
How can we look at the results within SynchWeb, e.g. from autoPROC:
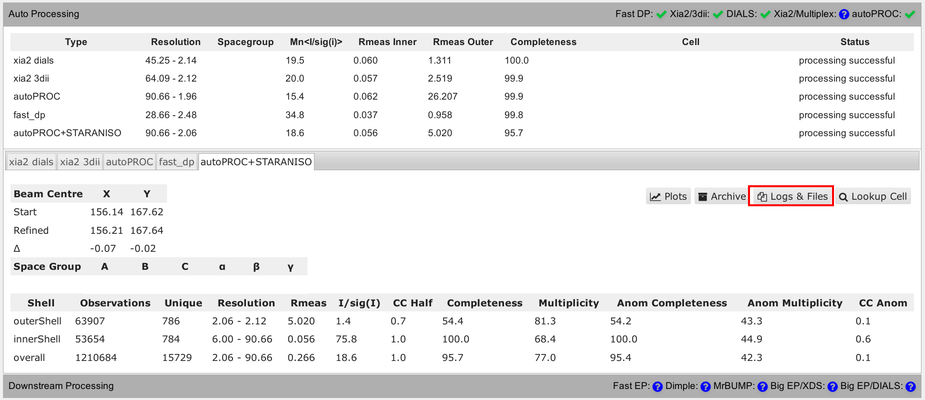
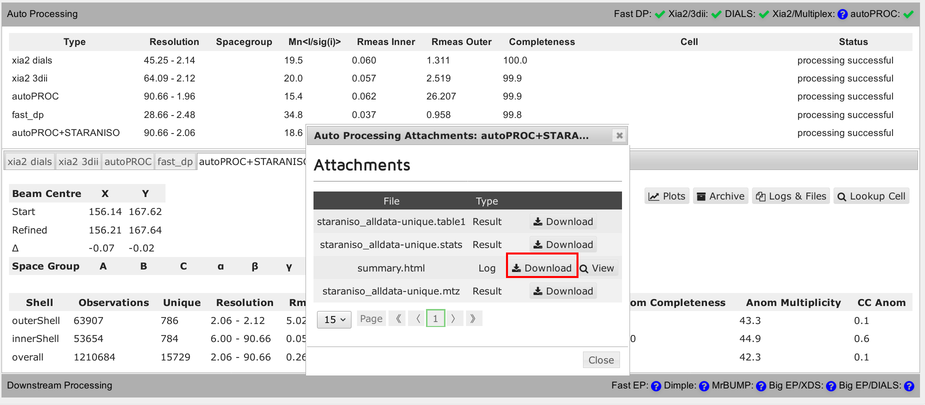
The full summary logfile can be viewed using the "Download" button:
Each pipeline will provide a final reflection data file (usually MTZ format):
Running jobs
Our software is usually driven by commands within a terminal (shell) - although there is a task for running autoSHARP within the CCP4i (not CCP4i2 - yet). We recommend using the command-line interface, since it gives you full access to all features and tools of our software packages (see also the autoSHARP reference card, which you should have as a printout). Once you get used to this way of running programs, it will become a very powerful way of running different programs (or different trials) on a large number of datasets.
You should be able to run jobs exactly as they are presented on the tutorial pages (for SHARP/autoSHARP or autoPROC) and described on the reference cards (autoSHARP, autoPROC) and in the manuals (SHARP/autoSHARP, autoPROC).
It might be a good idea to run any examples/tutorials or your own jobs in a fresh directory, e.g.
% mkdir ~/Projects/Lysozyme/Phasing
% cd ~/Projects/Lysozyme/Phasing
(here, "%" just denotes the so-called command prompt of your shell running in a terminal ... you don't need to type that character). It doesn't really matter what you name your directory, but try and stick with some system so you have a clear idea what results are in a particular location on your computer: this avoids unnecessary detective work 3 years later when writing up the methods section of a paper or depositing your structure and data to the PDB.
You could run experimental phasing with the data you collected during the workshop (see above how to get the data from SynchWeb onto your computer). Or have a look at the examples we provide here: just pick one of those examples - maybe one that will run quite quickly - and see what steps the program is performing. You could also pick just one of the various wavelength datasets for the MAD examples: some will work even with a single wavelength (SAD), while some might not work as well. Why is that?
A good way of getting started is to run
% run_autoSHARP.sh -h
to get a help message. At the end it will show some example commands for typical situations (SAD, MAD, SIRAS, partial model etc) that you should be able to easily adapt to your situation. Please note that
- If you don't have a sequence file handy, just give it the number of amino-acid residues per monomer (via the -nres <N> flag). Remember that you will have to specify the number of Se or S atoms (per monomer) in that case if you are doing a Se-MET or S-SAD experiment (since autoSHARP won't be able to determine the number of expected sites from a provided sequence)
- If you didn't do a fluorescence scan and you are not collecting close to the edge, just giving the wavelength value should be ok. You do need to also give it a "wavelength name" since the heavy-atom substructure determination with SHELXC/SHELXD uses those names (instead of actual scattering properties): for SAD experiments, using "peak" would be fine - otherwise use one of "peak", "infl", "lrem" or "hrem" as appropriate.
- To speed things up - or for testing different approaches - you could add the -nobuild flag to the command: autoSHARP will then stop after the initial density modification step. To restrict building to using only BUCCANEER, add the -nowarp flag. If everything worked well, you should have some interpretable electron density maps to see if the structure is solved. And if something (HA detection, hand determination etc) didn't work, no time will be wasted trying to build into an uninterpretable map. You can always re-run autoSHARP without this flag for successful jobs.
- Remember to load the LISTautoSHARP.html file (inside the directory created by the autoSHARP run - usually autoSHARP/LISTautoSHARP.html) into a browser (e.g. firefox) to follow the progress of the job - hitting the reload button from time to time.
So the exact sequence of commands could look like this:
% run_autoSHARP.sh -nowarp -fast -seq 1o22.seq -ha "Se" -wvl 0.9778 peak -7 5 -sca 1o22_peak.sca | tee autoSHARP.lis
- Open the autoSHARP/LISTautoSHARP.html file in a browser: this will show you the most important (as well as detailed) information at the various stages of structure solution. Pay special attention to the substructure solution and hand-detection stages to see if the experimental phasing might have succeeded.
- Once the job is finished, load the final results (model and map) into Coot via e.g.
      % cd autoSHARP/Results
      % ls *.scm
      % coot --script 05_coot.scm
- The exact name of the coot script (*.scm) might be different for different autoSHARP jobs: the standard output (as saved in autoSHARP.lis above) will give you all the details.


